

Introduction
In this year’s new iPhone range there are four models, two of which bear the “Pro” moniker, the iPhone 13 Pro and the iPhone 13 Pro Max. Unlike with the 12 Pro series, the camera set up in both the iPhone 13 Pro and the larger Max version is the same, so most of what is said in our review can also be applied to the bigger model.
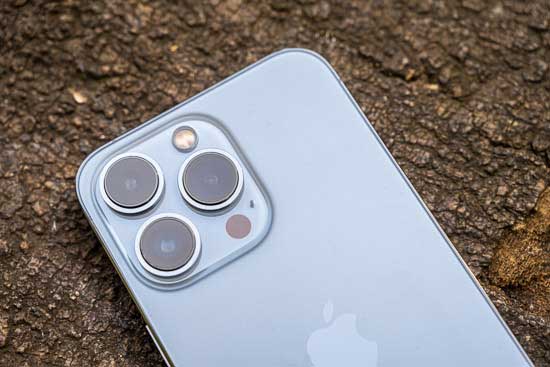
The iPhone 13 Pro features a triple lens set up, with a wide, super-wide and telephoto option on board. The wide angle lens is equivalent to 26mm and has an f/1.5 aperture, while the ultra-wide angle is an improvement from the iPhone 12 Pro model and now features an f/1.8 aperture (it remains at 13mm equivalent). The telephoto lens is also longer than its predecessor, now being a 3x optic (78mm equivalent), with an f/2.8 aperture. Apple is always reluctant to reveal the exact specification of its sensor sizes, but it has claimed that the new models feature larger sensors than the predecessor.
There are some other new specifications for the iPhone 13 Pro series, including sensor-shift optical image stabilisation, something which previously was only available for the 12 Pro Max version, Cinematic Mode for video, Photographic Styles for stills, plus the new A15 Bionic Chip with 5-core GPU which Apple claims is the fastest chip ever found in a smartphone.
A set of other specifications have been brought over from the iPhone 12 Pro, including Night mode, the ability to shoot in raw format, Portrait mode and 4K video recording at up to 60p. ProRes video recording will be available via a later firmware upgrade, but you will need the iPhone with at least 256GB of storage. In terms of the specifications not directly relating to photography, there’s a 6.1-inch Super Retina XDR screen, compatibility with MagSafe accessories (such as wireless chargers), and 5G connectivity.
At the time of writing, the iPhone 13 Pro retails for £949 for the iPhone 13 Pro 128GB, with up to 1TB of storage space available, which will set you back £1,449. If you want to go for the Max version, prices range between £1,049 and £1,549. There are four different colours available for the iPhone 13 Pro series, which are Sierra Blue (which we’ve been using for this review), Silver, Gold and Graphite (black).
Just as we saw last year, Apple don’t bundle a charging adapter with the iPhone 13 Pro (just the Lightning cable is included). It’s cited that this is for environmental reasons, with the assumption that most users already have one they can use – but if you don’t you’ll need to budget for one of those too.
Ease of Use
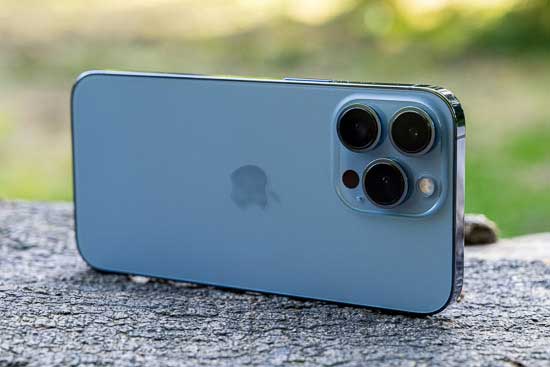 |
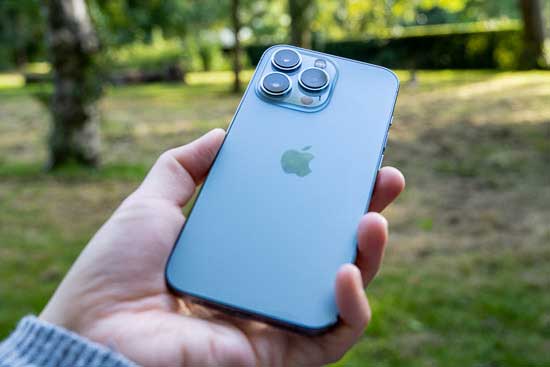
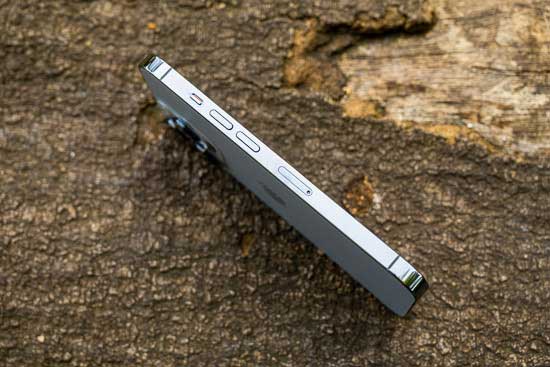
The design of the iPhone 13 Pro is almost identical to the iPhone 12 Pro. Keeping to the same squared off edge aesthetic as its predecessor, the 13 Pro is almost the same size as before, being just 0.25mm thicker than before. It’s a little bit heavier at 203g (vs 187g), but the difference in real-world use isn’t immediately obvious.
As before, we’ve got a 6.1-inch Super Retina XDR Display for the screen, which makes use of a Ceramic Shield designed for toughness, alongside Surgical-grade stainless steel. Both of these specifications together should make the iPhone 13 Pro reasonably adept at withstanding the odd knock or scrape, though we’d still recommend investing in a case for the phone. Despite being almost the same size as its predecessor, if you’ve already got an iPhone 12 Pro, you’re going to need to invest in a new case as the lens units on the rear take up much more space than before.
On the back of the phone you’ll see the three lenses are gathered together on the top left hand side, while there’s also a flash unit and what looks like a large black hole, which is the “LiDAR Scanner”, used for measuring depth and designed to make autofocusing faster in certain conditions, such as low light.
 |
Just like its predecessor, the iPhone 13 Pro has angular edges, something which was a design departure from the iPhone 11 Pro and before. There’s four different colours to choose from, with them being a little bit more muted compared to the options available for the iPhone 13 (standard). A new option for the 13 Pro series is Sierra Blue, which we’ve been using for this review.
If you’ve used an iPhone before then you’ll be very familiar with the native camera app, which you can launch directly from the lock screen by performing a “long press” on the camera icon. If your phone isn’t locked, you can also access the camera by tapping the appropriate icon on your home screen. Placing the camera in your iPhone’s “dock” can be a good way to access it quickly, no matter which page of the menu/app screen you’re on.
As anyone who has used an iPhone before will be aware, the native app is very simple and straightforward to use. While there is an argument to be made for this kind of simplicity, it would be nice for the “Pro” model at the very least to include some sort of more advanced or pro mode, just like we see on Android phones. That said, there are of course plenty of apps you can download to give you that functionality, and more and more settings changes are starting to creep into even the simple iPhone’s native camera app.
 |
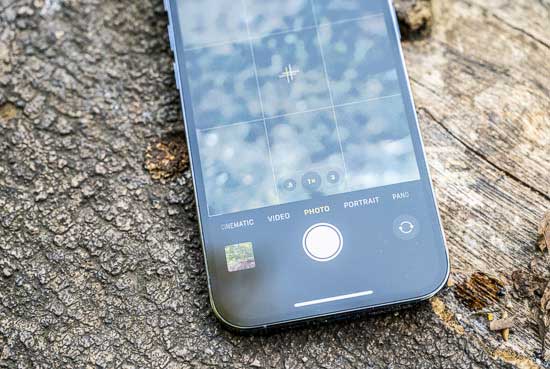
The native camera app will launch by default in “Photo” mode, which is what you’re likely to spend most of your time using. When in this mode, you can tap around the screen to change the focus point – metering will also take its cue from the active AF point. You can also tap on the screen and see a small sun icon appear – move your finger up and down on the screen and you’ll be able to adjust brightness. If you hold down your finger when selecting the AF point, then AE/AF lock will also engage, giving you the opportunity to focus and recompose without the native app trying to adjust focus or exposure.
Towards the bottom of the screen (or to the left if you’re shooting in landscape format), you’ll see where you can switch between the iPhone 13 Pro’s three different lenses. These are represented by three circles reading 0.5x, 1x and 3x. You can also pinch to zoom to engage the digital zoom beyond 3x – but this is something we’d probably advise reserving for when you’re desperate to get closer to the subject.
At the top of the screen there are a number of other options. You can switch the flash on or off, switch off Live Photos (whereby a short video clip is also recorded with your images). With this model, you also get the option to engage raw format shooting – images will be capture in the universal DNG format which can be read by multiple programmes. There’s no option to record in both DNG and JPEG/HEIF, but, it’s relatively easy to convert – even in the phone itself – to the more universal format if you need a picture for something such as attaching to an email. When you use apps such as Instagram, the raw files will be recognised as normal, so there’s no need to covert the files at this point either.
 |
Also at the top of the screen is a small arrow. If you tap this, you’ll reveal a set of extra settings you can change. These are the ability not only to switch the flash from Auto to Off, but also to Always On as well, plus the same functionality for Live Photos. There’s also the opportunity to choose a different aspect ratio (4:3 is the default, but you’ve also got Square – 1:1 or 16:9 to select from), adjust exposure compensation, switch on a Timer and add some digital filters.
A new addition here is the Photographic Styles, which can be activated at the point of capture and are subtly different from the digital filters. The options here are Standard (no Style applied), Rich Contrast, Vibrant, Warm and Cool. Each of the styles can also be modified by adjusting Tone and Warmth. Once a Photographic Style has been selected, an icon will appear in the top right hand corner of the screen to indicate one is being used. This is a handy reminder to save you from shooting all your pictures in one particular Style – especially as these can’t be removed post capture. It’s also worth noting that these can’t be used when shooting in raw format.
Night mode is something we’ve seen on iPhones for a couple of generations now, but as before, it’s not a selectable mode. Rather, it will automatically activate if the light is low in a scene. You will know if it has been activated by the presence of a small moon icon in the top left hand corner of the screen. The mode works by shooting a series of small exposures and merging them together. The length of time the phone shoots for will generally depend on how dark the scene is, but you can also take control over it by pressing the small icon at the top of the screen and pressing the note mode icon. If you’re going to shoot for a long period of time, it’s worth using something to stabilise the phone, such as a mini tripod or similar. Note that this icon will not appear if light is bright.
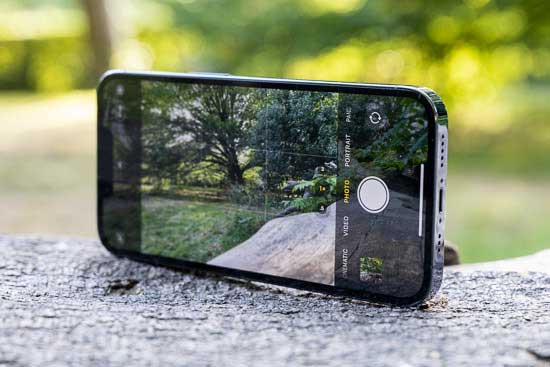 |
A useful feature which we first saw in the iPhone 11 series is the ability to see outside of the frame when you’re shooting in the standard Photo mode and using either the 1x or the 3x lens. The native camera app uses data captured by the other lenses to display outside the frame at the edges of the composition window – this can be very useful for making sure you always capture the decisive moment.
Other shooting modes are available as well as Photo mode, which can be accessed by swiping left or right from the main Photo mode, or you can also tap the words as they appear at the bottom of the screen. The modes are divided into stills modes and video modes, with video modes found on the left, and photo modes on the right. That leaves you with Video, a new Cinematic mode, Slo-Mo and Time-Lapse for moving images, and Portrait and Pano for stills.
With video mode, you get the option to record in 4K or HD at frame rates between 24 and 60fps. You can choose different resolutions and frame rates by a simple tap in the top right hand corner of the screen. You can also record video while in Photo mode by holding down the shutter release button, but it will simply record in whatever settings you were previously using.
 |
In Video mode, you can use all three of the lenses, and as with the Photo mode, you can tap around the screen to adjust AF point and exposure. You can also switch the flash to on, off or Auto (when it use it will activate as a continuous light).
You also have the option to record in Dolby HDR, which produces more vibrant imagery, but it’s worth noting that this will only be displayed as it is captured on a compatible device (such as the iPhone itself). You can choose to switch off Dolby HDR if you prefer from the main settings menu, which can be helpful if you’re trying to save space.
A new mode for the iPhone 13 series is Cinematic. This mode enables the creation of shallow depth of field effect videos, which is something we’ve seen on Android phones for a while but it is new for iPhone. The phone will automatically select an “aperture” to record at (or a simulation thereof), but you can also adjust this yourself manually. This type of video works well for subjects with very obvious outlines, such as people or pets, and it does well to switch between subjects where there are multiple subjects in the scene. Cinematic mode is only…